1. 背景
- ここ数ヶ月ほど OpenColorIO v2 (以後 OCIO v2 と略す) の configファイルを触っていた
- これまで画像に対して OCIO v2 を使った色変換を行うには、毎回 Nuke や Affinity Photo などを起動していた
- 流石に面倒になってきたのでコマンドラインでサクッと変換したくなった
ocioconvertというコマンドの存在を思い出したので試してみることにした
2. 目的
ocioconvertを使って画像ファイルの色変換を行う- その際に config.ocio の
view_transformsも適用できるようにする
3. 結論
ocioconvert コマンドを使い、以下の通りにコマンドを入力すれば変換できることが分かった。
ocioconvert --view inputimage inputcolorspace outputimage displayname viewname
例として、以下の条件で ocioconvert を実行した様子を示す。
| 条件 | 項目 |
|---|---|
| config ファイル | OpenColorIO-Config-ACES で配布されている reference-config-v1.0.0_aces-v1.3_ocio-v2.1.ocio [1] |
入力画像の colorspace |
ACES2065-1 |
出力画像の display colorspace |
Rec.1886 Rec.709 |
view_transform |
"ACES 1.0 - SDR Video |
ocioconvert を実行した様子
export OCIO=/ocio_config_dir/reference-config-v1.0.0_aces-v1.3_ocio-v2.1.ocio  # ocio_config_dir は .ocio を保存したディレクトリ
ocioconvert --view ./src_aces2065-1.exr "ACES2065-1" ./dst_rec.1886-rec.709_aces-1.0-sdr.exr "Rec.1886 Rec.709 - Display" "ACES 1.0 - SDR Video"
4. 詳細
4.1. ocioconvert とは
ocioconvertは OCIO v2 に含まれるツールの1つである。OCIO v2 をソースコードからビルドすると自動で入る。
ocioconvert以外にもociocheckやociochecklutなどのツールが存在する。詳細に関しては公式ドキュメントを参照して頂きたい [2]。
4.2. インストール
公式ドキュメントを読んで頑張ってソースコードからビルドする[3]。自分は Ubuntu 22.04 上でビルドした(業界的には RHEL だと思うが)。
4.3. ocioconvert のヘルプを読む
OCIO v2 の公式ドキュメントにはocioconvertコマンドに渡す具体的なパラメータについての記載が無かった。
そのためocioconvertコマンドのヘルプが唯一の手がかりである。
ocioconvert -h を実行した結果を以下に示す。
usage: ocioconvert [options] inputimage inputcolorspace outputimage outputcolorspace
   or: ocioconvert [options] --lut lutfile inputimage outputimage
   or: ocioconvert [options] --view inputimage inputcolorspace outputimage displayname viewname
   or: ocioconvert [options] --invertview inputimage displayname viewname outputimage outputcolorspace


Options:
    --lut                  Convert using a LUT rather than a config file
    --view                 Convert to a (display,view) pair rather than to an output color space
    --invertview           Convert from a (display,view) pair rather than from a color space
    --gpu                  Use GPU color processing instead of CPU (CPU is the default)
    --gpulegacy            Use the legacy (i.e. baked) GPU color processing instead of the CPU one (--gpu is ignored)
    --gpuinfo              Output the OCIO shader program
    --h                    Display the help and exit
    --help                 Display the help and exit
    -v                     Display general information

OpenImageIO or OpenEXR options:
    --float-attribute %L   "name=float" pair defining OIIO float attribute for outputimage
    --int-attribute %L     "name=int" pair defining an int attribute for outputimage
    --string-attribute %L  "name=string" pair defining a string attribute for outputimage
これを読むと、筆者の目的を果たすには --view オプションを使用すれば良さそうである。
また、その際はパラメータとして inputimage、outputimage、inputcolorspace、displayname、viewnameを指定すれば良いことが分かる。
4.4. inputimageとoutputimageについて
基本的には OpenEXR のファイル形式を指定しておけば問題ない。 OpenImageIO がインストールされていれば、OpenImageIO がサポートしているファイル形式を扱えるようだが[2] 本記事では確認は割愛する。
4.5. inputcolorspace、displayname、viewnameについて
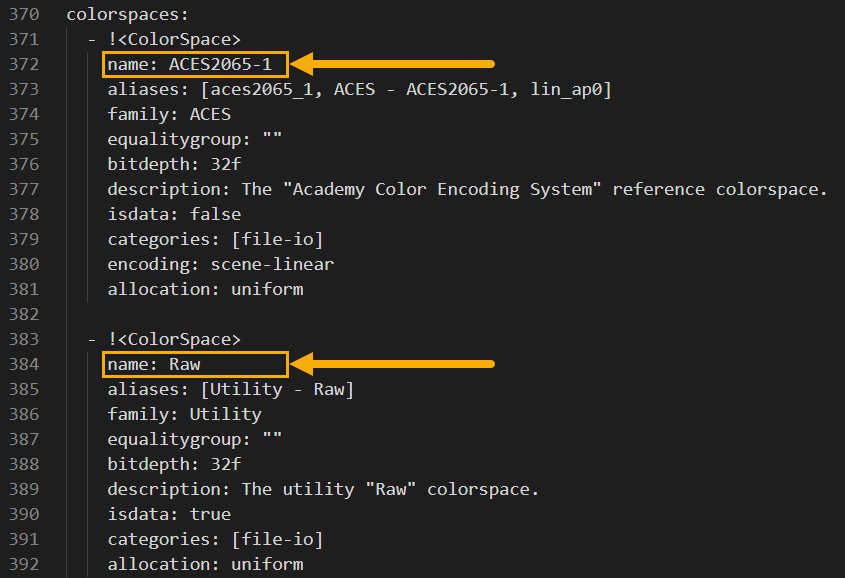
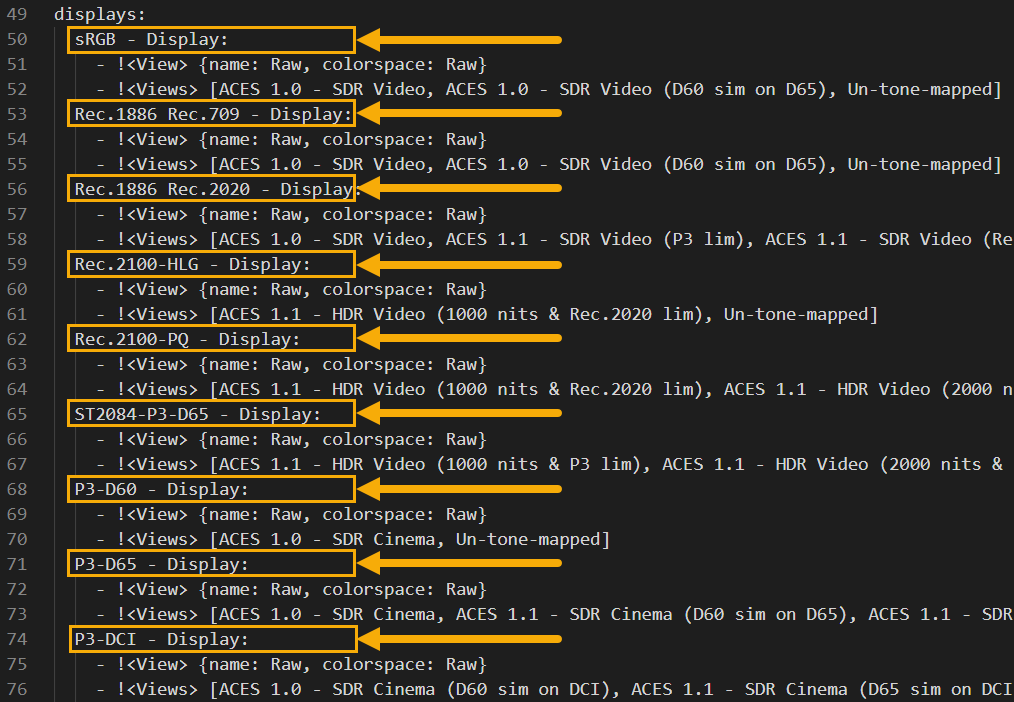
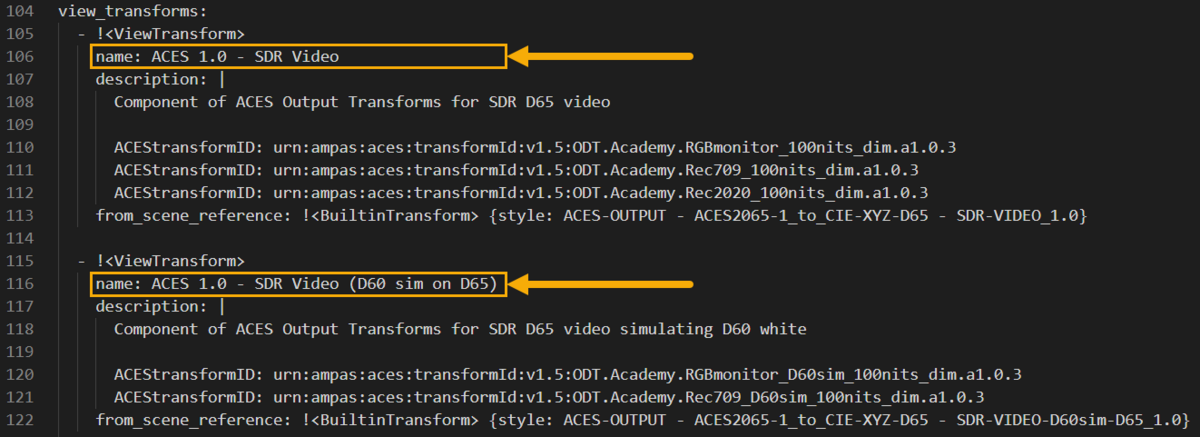
inputcolorspace、displayname、viewnameはそれぞれ config.ocio にて定義されている名称を使う。
例として reference-config-v1.0.0_aces-v1.3_ocio-v2.1.ocio にて記載されている場所のスクリーンショットを以下に示す。
inputcolorspace |
displayname |
viewname |
|---|---|---|
 |
 |
 |
4.6. config.ocio の指定について
ocioconvert コマンドでは config.ocio のパスを指定するオプションが存在しない。
そのため config.ocio のパスは環境変数OCIOを用意して事前に指定しておく必要がある[4]。
Linux で bash を動かしている環境であれば、以下のようにexportを使って指定すれば良い。
export OCIO=/ocio_config_dir/config.ocio # ocio_config_dir は .ocio が存在するディレクトリ
4.7. 実行例
冒頭の結論とは条件を少し変え色変換を行った例を以下に示す。
| 条件 | 項目 |
|---|---|
| config ファイル | OpenColorIO-Config-ACES で配布されている reference-config-v1.0.0_aces-v1.3_ocio-v2.1.ocio [1] |
入力画像の colorspace |
ACES2065-1 |
出力画像の display colorspace |
Rec.2100-PQ - Display |
view_transform |
"Un-tone-mapped |
ocioconvert を実行した様子
export OCIO=/ocio_config_dir/reference-config-v1.0.0_aces-v1.3_ocio-v2.1.ocio  # ocio_config_dir は .ocio を保存したディレクトリ
ocioconvert --view ./src_aces2065-1.exr "ACES2065-1" ./dst_rec.2100-pq_un-tone-mapped.exr "Rec.2100-PQ - Display" "Un-tone-mapped"
入力画像と出力画像は以下のようになり、想定通りの変換が行えていることを確認できた。
| 入力画像 | 出力画像 |
|---|---|
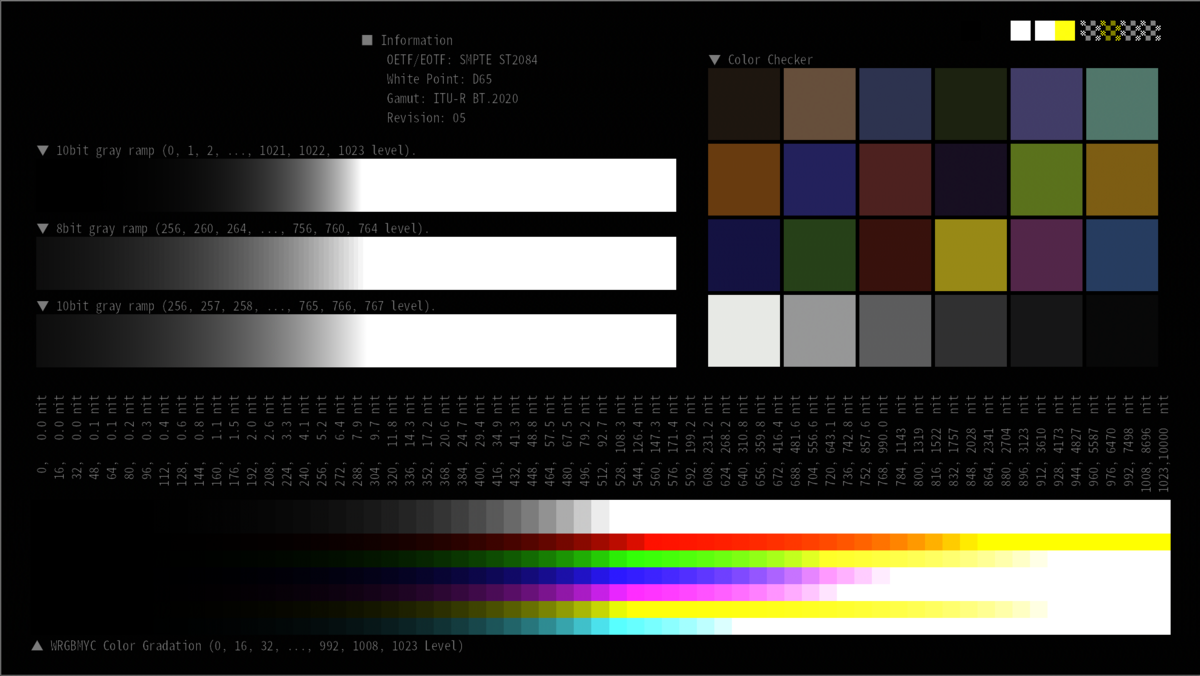 |
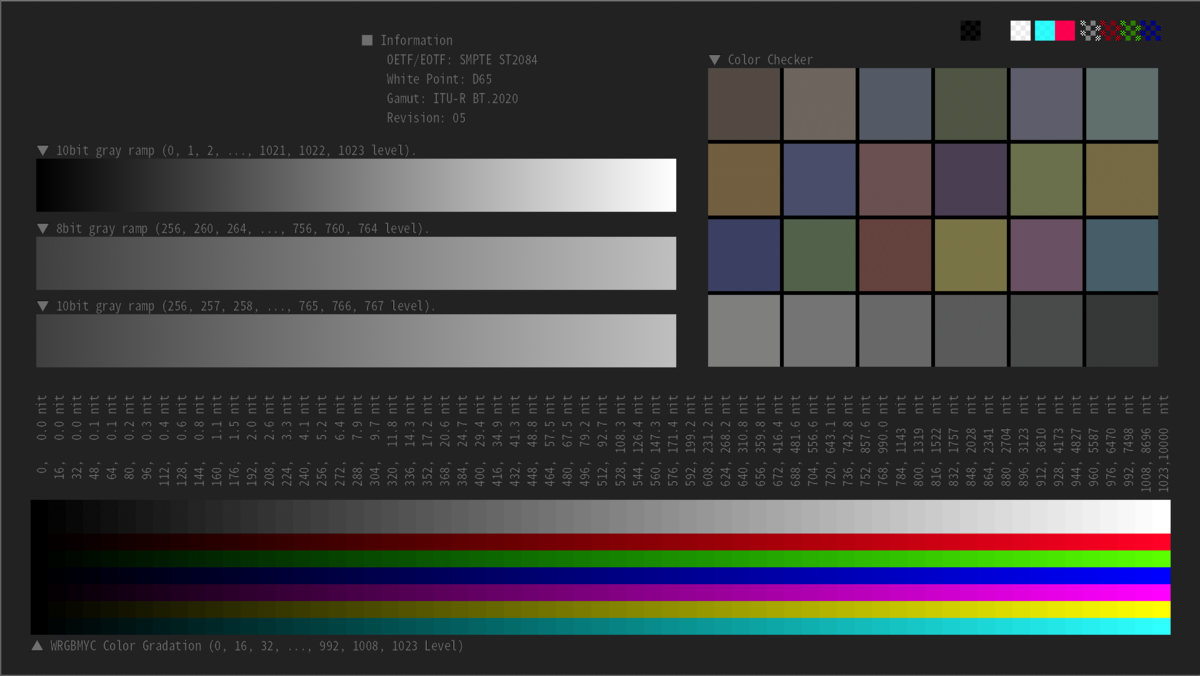 |
5. 感想
ということで ocioconvert の基本的な使い方が分かった。
本当は OpenImageIO を使った OpenEXR 以外のファイルフォーマットも試したかったが、それは別の機会に試そうと思う。
今まで ACES の Output Transform をコマンドラインで適用するには ctlrender を使ってきたが、今後は ocioconvert を積極的に使っていきたいと思う。
参考資料
[1] AcademySoftwareFoundation, "OpenColorIO-Config-ACES 1.0.0", https://github.com/AcademySoftwareFoundation/OpenColorIO-Config-ACES/releases/tag/v1.0.0
[2] OpenColorIO, "Tool overview", https://opencolorio.readthedocs.io/en/latest/guides/using_ocio/tool_overview.html#tool-overview
[3] AcademySoftwareFoundation, "OpenColorIO/installation.rst", https://github.com/AcademySoftwareFoundation/OpenColorIO/blob/main/docs/quick_start/installation.rst
[4] OpenColorIO, "Using OCIO", https://opencolorio.readthedocs.io/en/latest/guides/using_ocio/using_ocio.html